I needed to create a team calendar in SharePoint which, by default in SharePoint 2010, doesn’t give you an option for colour-coded categories.
So, what follows is a workaround (and a bit of a faff, to be honest) but it gives you what I was aiming for.
Permissions
I’m starting with the assumption that you already have a SharePoint calendar, or know how to make one via ‘Create new content’. But you may not have the rights to do the tinkering: you need access permissions which are sufficient to let you play with list settings:

Once you’re looking at the list settings you need to scroll down past ‘List Information’, ‘General Settings’, and ‘Content Types’ to find the ‘Columns’ section.
Within ‘Columns’ you’re looking for ‘Category’. Click on that.
Categories
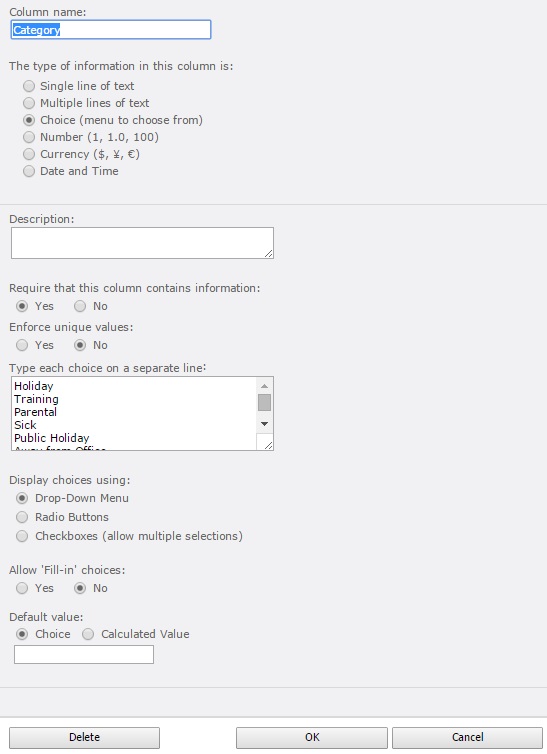
On the right-hand side of the page we’re only interested in the bottom half of the options available. To ensure that every calendar item is categorised, leave ‘Require that this column contains information’ set to ‘Yes’. leave ‘Enforce Unique Values’ alone (set to ‘no’).
Below that, this is where you create the list of categories you want to have available under ‘Type each choice…’. In my case this was for a team availability calendar so I put in entries like ‘Holiday’, ‘Training’, and ‘Public Holiday’. You can have up to ten of these (because of a limitation we’ll see later on the number of overlaid calendars):
Create calendar views
Return to the calendar and under ‘Calendar Tools’ create a new view, named sensibly to match one of your previously entered categories. Then, underneath it, click ‘Modify View’.

The things you might want to change are the ‘View Name’, the ‘Default Scope’ (most of the time the week view makes the most sense), and then the Filter. It’s the filter that is crucial to make all of this work.
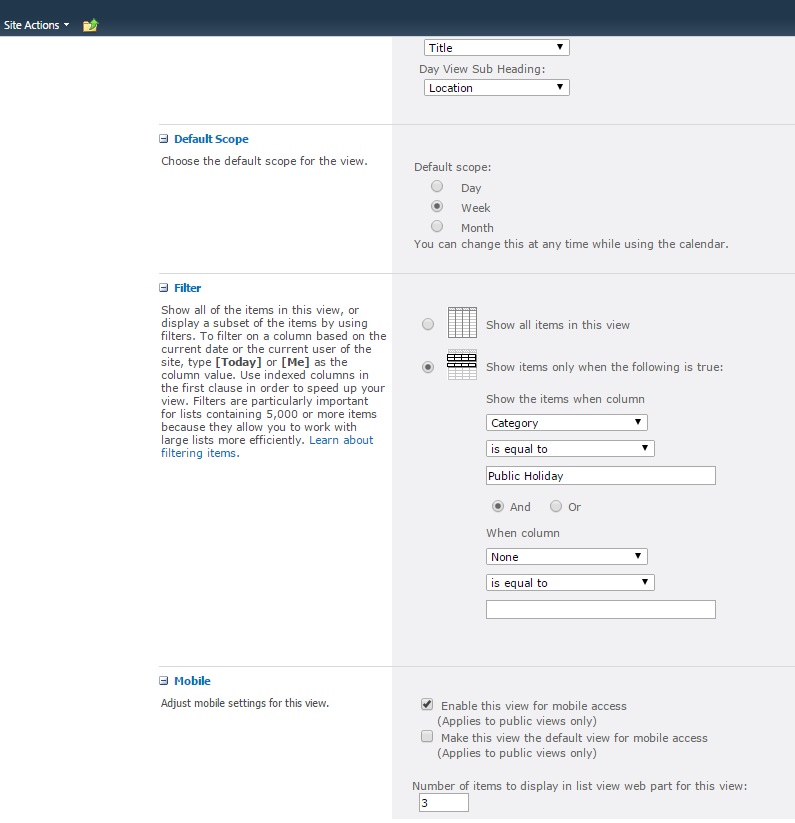
In this example, as you can see, the filter only shows items when the category (which you’ll remember we made a mandatory entry) matches up with one of the ones you’re expecting to see. You will now need to go back and create more views in the same way, with each new view modified to only show entries that match the appropriate category (i.e. the view for Holiday should filter so it only shows entries in the ‘holiday’ category).
Overlay calendars
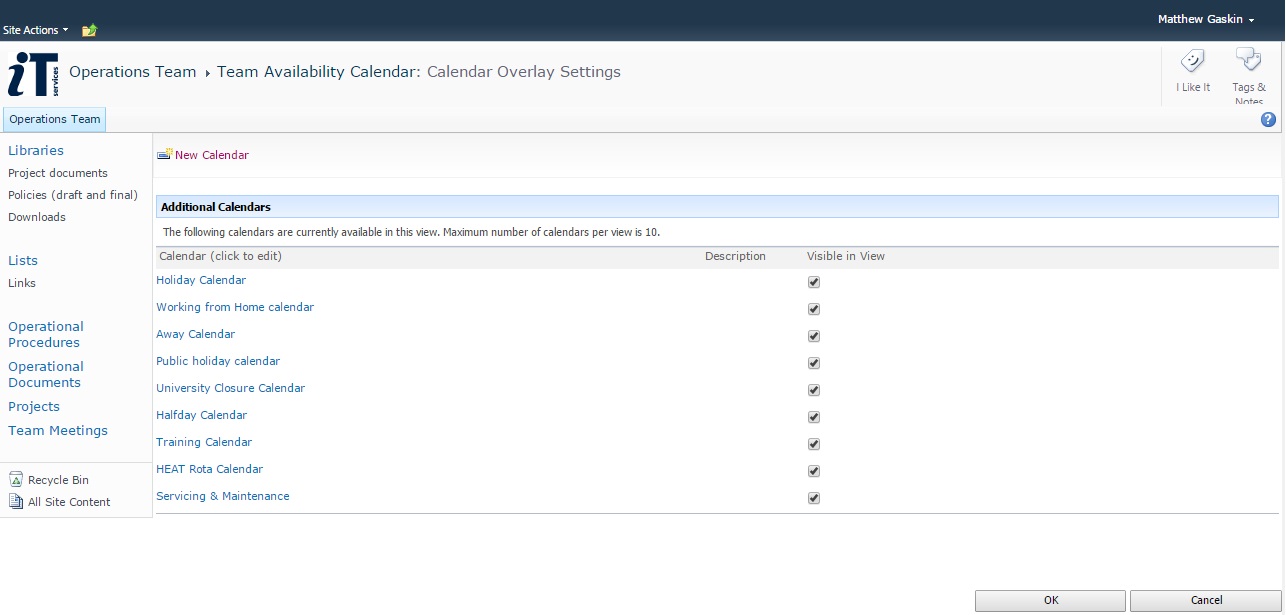
Now we need to take all of the calendars you’ve created and overlay them. Each one will have its own colour-code, with the available choices dependent on the theme you have for your SharePoint site.

When you’ve clicked on ‘Calendars Overlay’ you’ll see a ‘new calendar’ button – this is how you get each category to appear on one page – and you’ll see just below that you can have a maximum of ten overlaid calendars. This is why we had a limit of ten categories earlier.
On the righthand side you can give each overlay a name but the important part is the colour selection. Don’t try and remember the URL yourself – the ‘Resolve’ button does that bit of hard work for you – and will then let you pick the overlay you want as the ‘list view’.
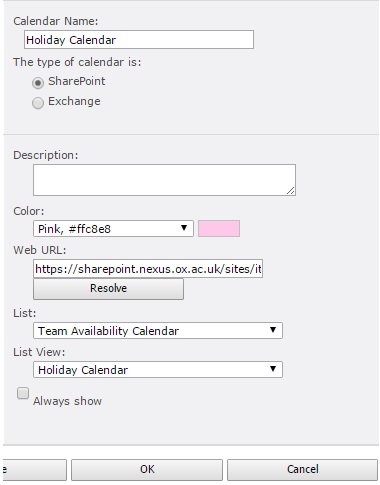
The ‘always show’ button should NOT be ticked, although this seems counter-intuitive, as having it ticked will actually create duplicate calendar entries.
Again, you’ll need to repeat this step several times, adding each category’s calendar into the overlay (with a different colour each time)
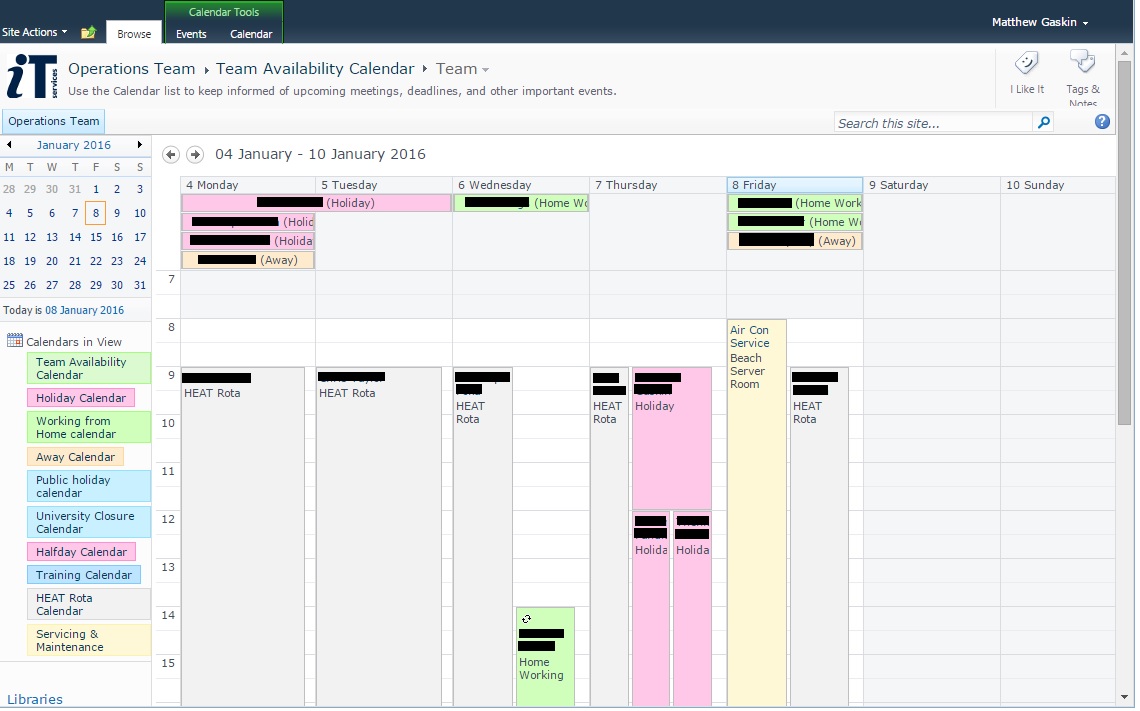
Eventually you’ll see the full list of your categories all being visible within the main top-level calendar.
The final step is to test that it all works as expected, by creating some entries. You should find that the ‘category’ field has a red asterisk to indicate it’s mandatory (and of course shows the categories that you want).
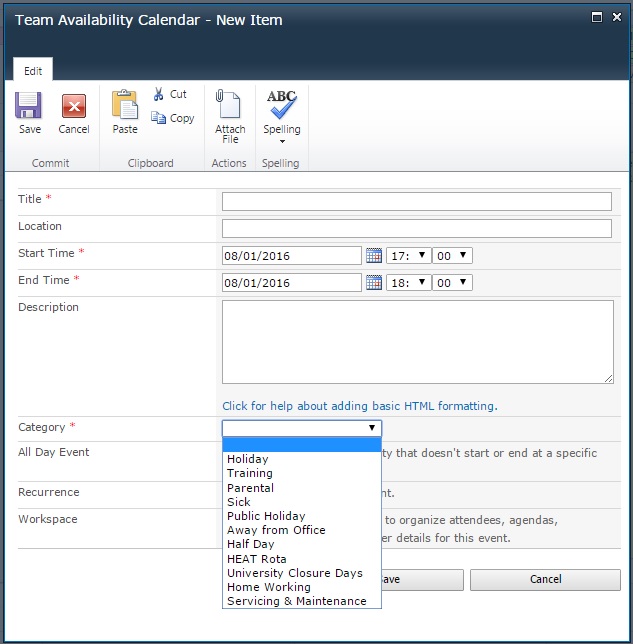
If you’ve done it right, it’ll look something like this. As an added bonus, if it gets a bit too busy to spot something, the lefthand column isn’t just a key: it lets you see just one particular category of entry at a time: